Roadmapping and Feature Design Full Process
Background
When someone has a software product idea they often have some sort of rough deliverable that they feel will give a clear picture of their idea to a development team. They bring me things like:
- A prototype made in Word, Excel, on paper or Microsoft Paint (yes, it happens).
- A massive spec list of features
- A link to another established product with a rough description about how their product is different.
Unfortunately, this is not the plan you want to give to a development team. Over the years we struggled with coming up with a good way to streamline how to kick off projects in our agency. I have developed this into becoming a very streamlined system that, over the course of a few days gives the following to the client:
- A very clear picture of the problem you’re trying to solve and a paired down set of features to meet those needs.
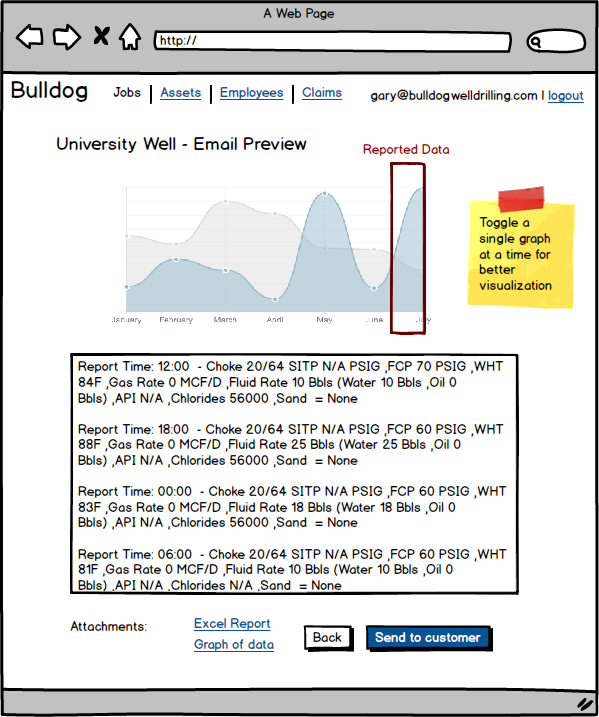
- A set of clickable mockups that flow from one another. This gives you (and your potential clients) something to tangibly touch and feel at a low cost. This really makes the workflow come to life and discover if it makes sense.
- A prioritized list of features you can give to any internal or external development to provide an apples-to-apples quote and timeline.
- Bonus: An estimate and timeline from Quickjack Solutions on how much it will cost for us to build it for you.
Here’s the thing: we aren’t doing anything magic. The process is systematic that you can do yourselves for (almost) free!
So let’s get started:
The Half Day Workflow Brainstorm
Goal: Instead of working from a massive list of features, nail down the core problem the client wants to solve. Build the features out from there.
Every single client that has come to me has a massive list of features that they want implemented in the system. The reality is that only a small subset of those features will give them 80% of what they actually need. We need to understand which is core to the solution, and which are nice to haves. That way, we can help the client stay focused.
When we have problems we want solved by software, there is a tendency to believe that having an “integrated” software product that does everything is better than a small, focused solution with few features that is intuitive, and less expensive to build. While the former belief is sometimes true, it’s far more expensive, takes long to build and has higher risk.
Premeeting:
- Develop an agenda with the goal of the meeting, questions you’ll be posing to the group and any assumptions you want to highlight. Send it to the client so they can establish who would be best to participate.
- Find a mutually useful time for you and the client. If they would like, get them to invite some stakeholders who would be using the end product to get their feedback. Ideally the meeting should be in person, especially if there is more than one person from the client side. Otherwise doing a meeting online is a good second best.
In meeting (2-3 hours):
- Everyone coming to the meeting already has a vision of what the app should do and how it should behave. You need to keep the meeting focused around the “core business problem we are trying to build”. This is keep people really focused.
- Record the meeting if you can. You might need to refer back to something they said.
- Organizing this information as it’s discussed is really important. I used to use paper, but have since moved to the Tree app (no longer available online) which was fantastic. Make each step in the workflow it’s own line item, we’ll move them around and break them down later.
Questions to ask:
- What is the core business problem we are trying to solve? Why is it painful?
- “Let’s walk step by step how those with the problem handle it now.” Literally have them start from before the problem happens, to after the problem is resolved. This will probably result in 5-10 steps.
- Who else is involved in solving this problem? You’re trying to identify other stakeholders who will need to interface with the system. Finance people? Employees? Their clients?
- What would be the ideal workflows for person X (identified in previous step) in an app? The goal here is discuss tradeoffs to simplify the user experience and to build in opportunities for automation. Remember, your client is often non-technical and doesn’t see the opportunities to simplify and automate that you do. Then you can counter with more probing questions: “would that be better than doing it on an iPad or mobile device?” “How will the user know of a change? Should they get an email? Are they logging in everyday so they will see it anyways?” “Does the user care about how the app is designed?”
- For each of the stakeholders identified in 3, ask the same question as 4: “What would be the ideal workflow for the Finance Administrator?”
- If you have time, feel free to ask about other problems that were put off at the beginning of the discussion. Do another run through the questions above.
The Mockups
Goal: While theoretical list of specifications are handy for contracts, they do little by way of getting real, meaningful feedback from the client. By giving them rough mockups, it creates something tangible that the client can play with, and use to engage their stakeholders. This is probably the first opportunity for them to see how the product has the potential to become reality.
I use the popular wireframing tool called Balsamiq mostly because it was one of the first of it’s kind and I’ve used it weekly since 2010. They have made it really easy to upload your mockups online for client viewing and commenting.
For each stakeholder, go screen by screen and build them the workflow as described in the brainstorm session. This is the right time for you to figure out tradeoffs while thinking through how that stakeholder will be using the product.
Link all of the screens together. Periodically, do a run through in full screen mode to make sure all the screens make sense and aren’t too confusing.
The “sticky note” markup is useful to explain confusing parts of the mockup. Tip: If you have to explain a screen, from a User Experience perspective, there might be a better way to tackle the problem. Ask yourself: “is there a simpler way to do this?”
Upload the screens to mybalsamiq or generate a clickable PDF for them to view. In that same email with the link, explain the tradeoffs you made and propose a time to go over them in the next day or two.
Feature Design
It’s important to do this after the mockups (above). The mockups can change quickly. It’s also easier to see the entire flow of a feature, then look at each screen afterwards and extract the specifications from the mockups. Additionally, the client only really cares to see these mockups when determining the functionality. They won’t spend nearly as much time looking at the (more boring) feature spec. It will be used mostly for contractual purposes.
Create a new top level tree for each page in your mockups like this
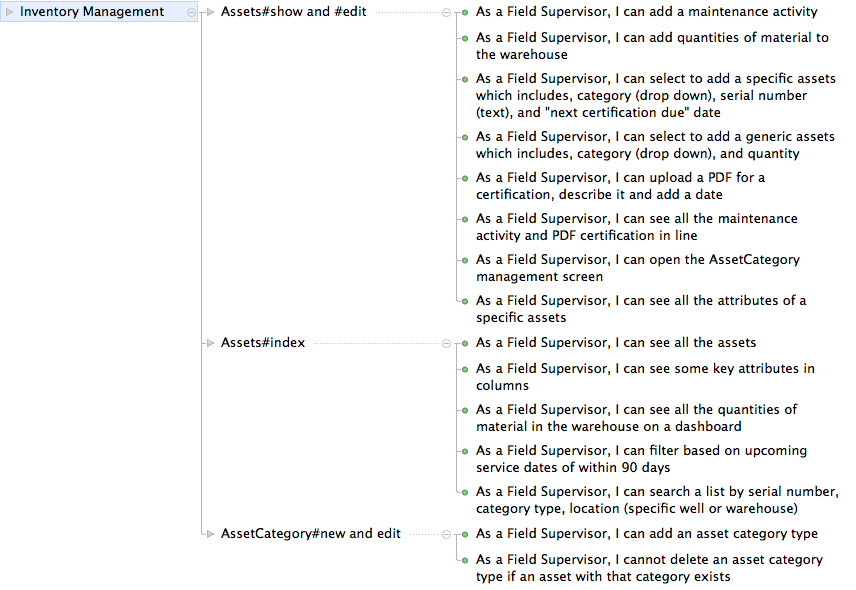
From here it’s time to break down each step into tasks into User Stories. Each story should be small enough to ensure that there is a low risk that the scope of this feature won’t grow. I write them like this:
“As a (role), I want (goal/desire) so that (some purpose)”
There are a few good reasons for writing them in this way. Notice how it doesn’t dictate exactly HOW (the implementation) it should it done? It makes it clear to you, the client, designer, and developer the intention so that that person who is doing the implementation has the context so they can make intelligent design decisions.
Let’s do an example. In the brainstorming, the client says: “I want to be able to add my physical assets and see their maintenance history, but I don’t want my employees to add assets”. Breaking it down, it could look like this:
- As a Supervisor, I can add a physical asset (includes description, serial number and purchase date) so I assign them to a job later.
- As a Supervisor, I can upload a PDF with the maintenance information and a date field so my paper documents are centralized and easy to find.
- As a Supervisor and User, I can see all maintenance activity so I only see the maintenance info I care about.
- As an Operator, I cannot add a physical asset because I don’t have the responsibility of purchasing new assets.
- As an Operator, I can see all the assets so I know what is possible to assign to a job.
Each of those can easily be understood by a developer and acceptance tests can be written (if that’s your style).
It’s important to go through each screen in the mockups to be sure that all the features from the mockups are captured in the feature design and vice versa. That way you’re sure both you and the client have a clear picture of what is to be delivered and you have fewer scope issues down the line.
Prioritize
Take all the user stories and sort them up into modules. That way it’s easier to discuss these high level features with the client.
Now that you have a good understanding of the real pain points of the client, prioritize the modules in such a way that you clobber their strongest pain right away, so you can deliver this soonest. Discuss with the client if you have their priorities right.
Estimate for the Project
80% of the hard scoping work was already completed in the previous steps. Therefore, we simply go through each story and estimate how long each task will take. We then figure out the estimate for each one and deliver that in a nice spreadsheet for the client to use. That way, it’s easy for them to “build their own proposal” and pick and choose which tasks are important to build now, and which can be pushed off to a (potential) next release.
If the client wants to include a particular feature because they think it will be important to them, this line works well: “Listen, this is only the first phase. If it turns out you need it, great, we can build another phase to the project”.
Optional: Mockups to Responsive HTML
We haven’t felt the need to do this yet but I think it would be really neat. With the Balsamiq mockups, it’s not the easiest to get a sense of what the app would be like to run on the phone. To give the client an even better feel of how the product would work, you have a few options:
- Build it out in a very basic version of Twitter Bootstrap? It could be posted online making it very easy for the client to open on their phone and send to friends. The cost for this could be quite inexpensive as there are tons of people on Odesk who could do this for $10 USD/hr. Talk about massive value!
- Get a designer to build out the wireframes to make it look pretty. Then use a tool like Marvel App to link them all together on your phone. This could run you around $1000 for a decent graphic designer to do some quick wireframes but provides tremendous value to the client.
What about you?
I love doing this stuff. It’s amazingly inexpensive to do yourself yet can really provide lots of value. If you want to bring in some experience, why not hire me to do it? Want some help doing one? I’d be happy to give you some pointers, just schedule a call with me on Clarity.
Copyright Jevin Maltais 2026